
Tools and parts needed:
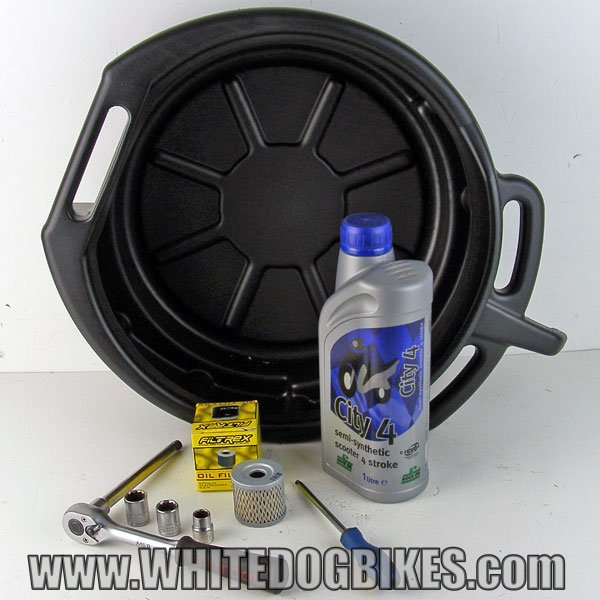
Oil, filter and tools needed for a Suzuki AN125 oil change
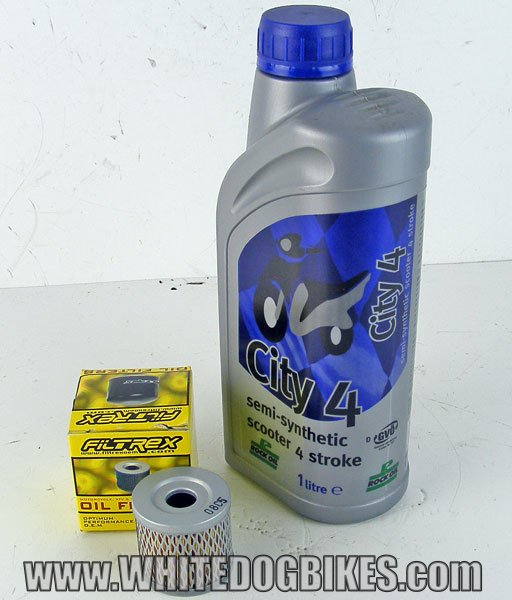
- 1 litre of good quality** 10w40 scooter oil (you can also use a fully synthetic 10w40 oil). You will need 850ml of 10w40 oil to refill the engine.
- 1 x Filtrex OIF011 oil filter (alternative filters: Hiflo HF131 and Champion X327)
- 1 x waste oil container (a washing up bowl or similar will do)
- Ratchet with 10mm (oil filter cover bolts), 12mm (oil filter drain bolt) and 14mm (main engine oil drain bolt) sockets (you can use spanners*** of the same sizes, but it’s easier with sockets!)
- 1 x Phillips/cross head screwdriver (to remove the front access panel)
** = We ALWAYS recommend using a good quality semi synthetic or fully synthetic oil in a scooter. Due to the bodywork on most scooters, they tend to run fairly hot (mainly because the bodywork tends to restrict airflow and cooling), a good semi or fully synthetic oil works better at protecting the engine at hotter temperatures than a lower spec oil.
Tip:*** = If you are using spanners instead of a socket set, please try, where ever possible to use the closed, ring end of the spanner instead of the open end as the closed end gives a better grip on the nut or bolt (this helps to avoid slipping and rounding the head off!)
Draining the oil:
- Put the scooter on the main/center stand and, if possible, start the engine and let if run for 5 minutes.
Tip: Engine oil always drains better when it is warm (because oil get’s thinner as it get’s hotter). If it’s possible to, start the engine and let it run for 5 mins to let it warm up before draining the oil (but, remember to be careful when draining as hot oil can burn!)
- Next, place your waste oil container underneath the scooter and locate the main oil drain plug.
The drain bolt is located in the center, underneath the bike, just behind where the main/center stand attaches to the bike.
AN125 main oil drain bolt location
- Loosen the bolt using a 14mm socket (remember, anti clockwise loosens the bolt, clockwise tightens it) and drain the oil into your waste oil container
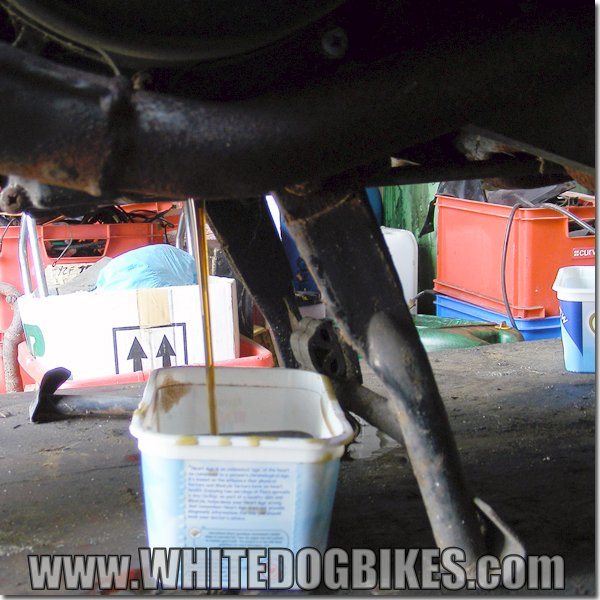
Engine oil being drained
Tip: As a general rule, almost all nut’s, bolts and screws are loosened by turning anti clockwise (turn to the left), and tightened by turning clockwise (turn to the right).
- Inspect the oil drain bolt and washer, if there’s no damage screw the bolt back into the engine and tighten with the 14mm socket. If the threads on the bolt are damaged, or the washer is very pitted or damaged, replace it.
Tip: If your not sure how tight the oil drain bolt should be, an approx guide would be to make sure the bolt (and threads) are clean, then screw the bolt into the hole with your fingers, then tighten it using a spanner or ratchet. When you tighten the bolt with the spanner/ratchet, pull the very end of the spanner/ratchet with your fingers until it just starts to hurt your finger tips, then the bolt should be tight enough (and this will help you avoid over tightening the bolt!).
Changing the oil filter:
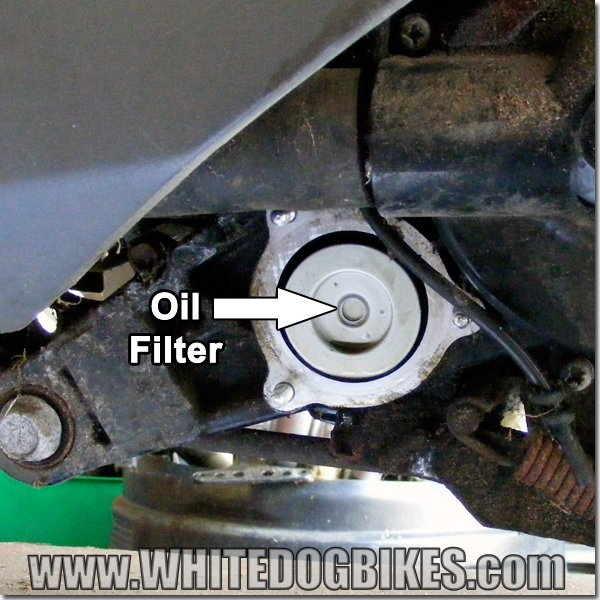
The oil filter housing is located on the left side of the engine, just above the side stand (it’s a round looking panel with 3 nuts holding it on).
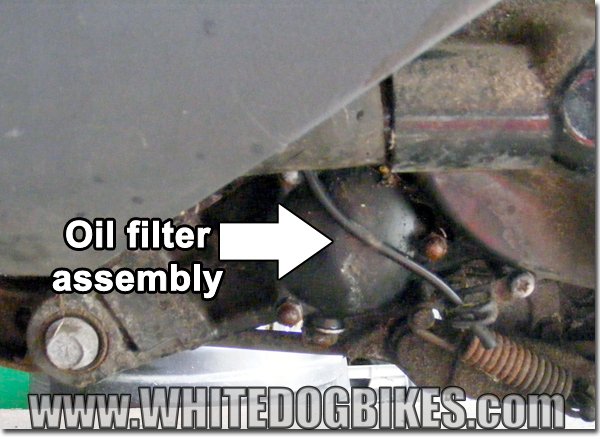
Oil filter location
- Place your waste oil drain pan under the oil filter housing, on the bottom of the housing there’s a drain bolt for the oil filter, remove this bolt with a 12mm socket (turning anti clockwise to undo) and drain the old oil from the oil filter housing.
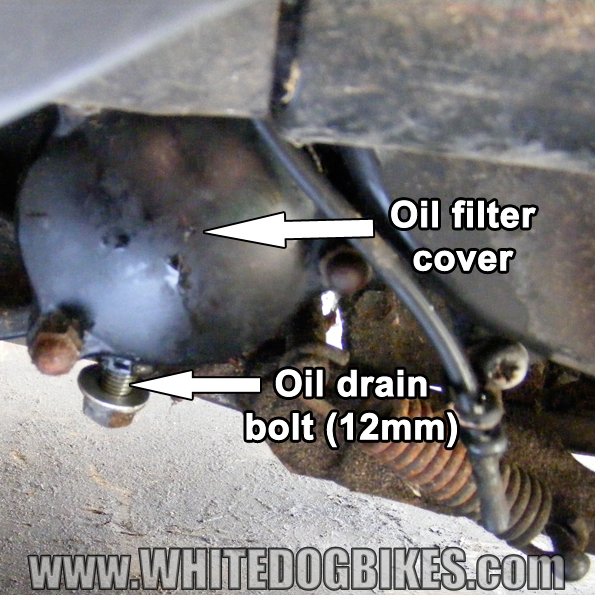
AN125 oil filter drain bolt
- When the oil has been drained, remove the 3 nuts from the outer edges of the oil filter cover to expose the oil filter.
AN125 oil filter inside the engine
Tip: If your removing or working with small nuts, bolts and parts, lay them on some clean A4 sized paper next to where your working (especially if your working very small parts, e.g carb parts!).
It’s much easier to locate things on a clean A4 piece of paper then it is on a dirty workshop surface or floor!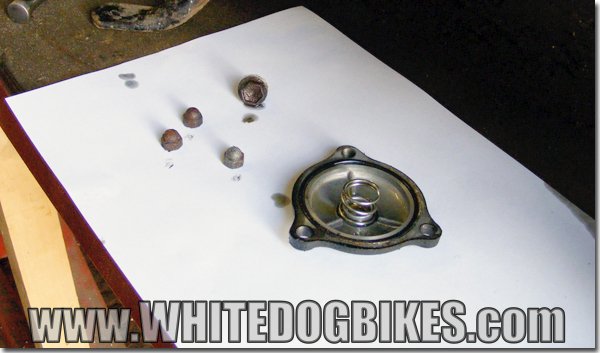
Lay out your parts on clean, A4 paper!
This can also be used to lay parts out in the correct order if putting certain bolts back in the same order or location is important (or if your going to leave the job for a few days and may forget where everything goes!)
- Remove the old oil filter from the engine (if it’s difficult to get out you can CAREFULLY prise it out with a flat ended screwdriver or similar).
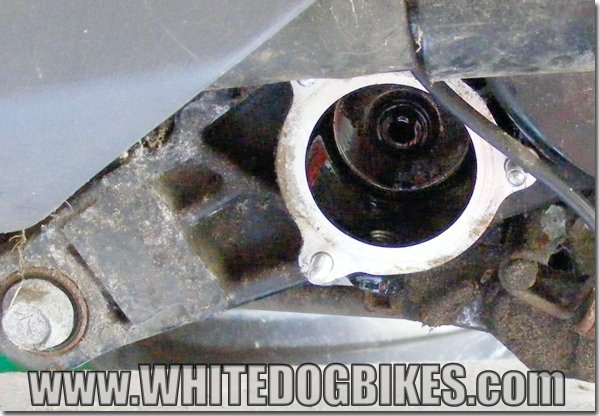
AN125 empty oil filter housing
- It’s worth taking a few minutes to visually inspect the old oil filter to see if there’s and metal bits or anything that might indicate a problem with the engine
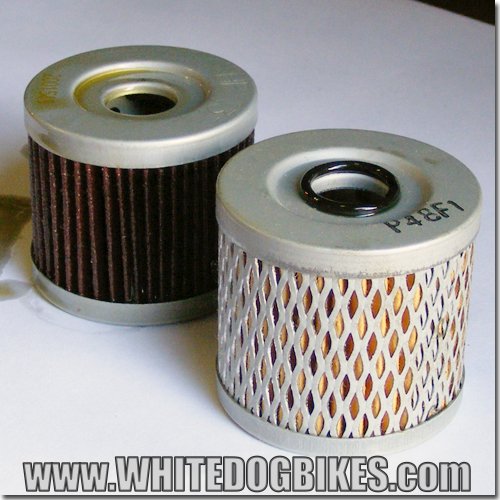
AN125 new and old oil filters side by side
- Insert the new oil filter in the housing (the open end of the filter goes into the engine first) and check the condition of the rubber seal on the filter housing cover (and replace it if it’s cracked, split or looks scruffy).
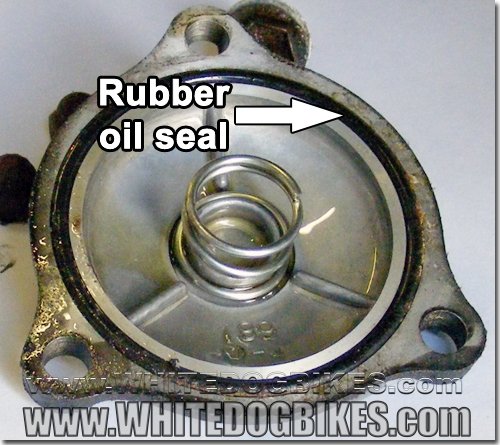
Check the rubber oil filter housing cover seal for damage
- Replace and tighten the 12mm oil filter drain bolt and the oil filter cover****
**** = IMPORTANT! When you replace the filter cover, tighten the bolts up by hand, then use a socket to tighten them up a half turn more (oil filters and housing covers don’t need to be very tight! Any tighter can damage the rubber oil seal which means oil will leak out!)
Filling the engine with oil:
Always use a good quality, 10w-40 engine oil!
- Peel back the rubber cover from the foot panel (the rubber panel that your feet sit on, it’s held in place by some rubber lugs and comes off if you peel it back from the corner). Using a Phillips/cross head screwdriver, take the 2 screws out of the panel on the front, under the seat (the dark grey panel that sits behind your feet. There’s 1 screw at the top and 1 screw at the bottom, under the rubber cover).

Remove the front cover panel to get access to the engine oil filler hole
The panel is also held in by a plastic tab on each side and the air inlet pipe is attached to the bottom (if you lever the panel forwards you can loosen the circlip that holds the pipe in place with a cross head screwdriver and disconnect the pipe).
Tip: If you have an air compressor, blast air around the engine bay to remove and loose dirt and debris (like leaves). If you don’t have a compressor, remove the debris by hand and give the area a quick clean. This helps to avoid any dirt and debris falling into the engine filler hole when it’s open (generally, things falling into the engine is considered very, very bad!!)
- Once the panel is removed, you can see the top of the engine and the screw in cover on the top of the engine.
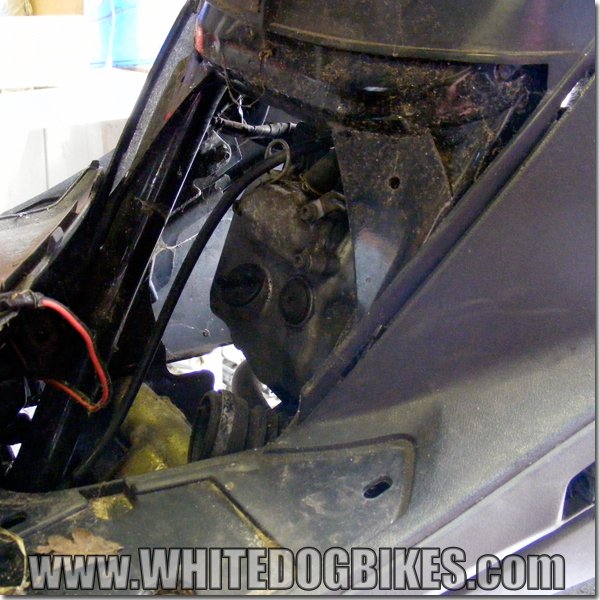
Behind the access panel showing the top of the AN125 engine
Unscrew the oil filler hole screw (turning anti clockwise) from the top of the engine (it’s the large, black thing that can normally be unscrewed by hand). If the oil filler hole screw is to tight to undo by hand, you can grip the bit you hold between your fingers and loosen it carefully with pliers.

AN125 engine oil filler hole location
- Place a clean funnel in the oil filler hole.
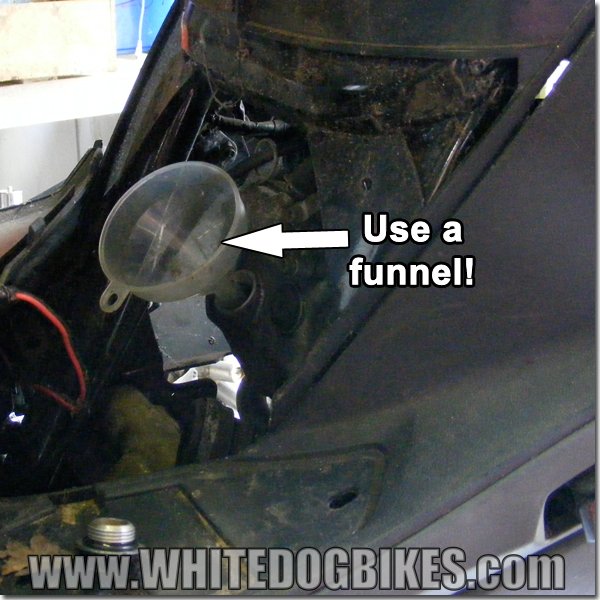
AN125 engine oil filler hole with funnel
- Fill the engine with 850ml of good quality, 10w40 engine oil
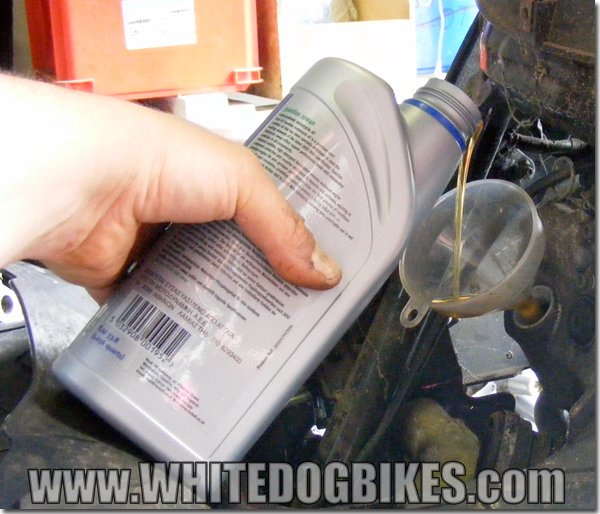
Filling the engine with oil
- Check the washer on the oil filler hole bolt (and replace if it’s worn or damaged), replace in the oil filler hole.
Then re fit the access panel (remembering to re attach the air inlet hose before you close the panel), re fit the rubber mat and you should be good to go! - Please remember! Engine oil is nasty stuff, so please don’t tip your old oil down the drain or into a bush, your local council will be able to dispose of waste oil and filters or your friendly local garage/dealer will probably dispose of it for a couple of quid!
Leave a Reply